


Install and activate LensNode
- Sign in to your Video Village Account and find your LensNode license page.
- Download the Video Village Plugins app.
-
On the license page, select
Activate on this deviceto launch the Video Village Plugins app and install your license automatically. - In the Video Village Plugins app, select
OpenFX, then selectInstall. (DaVinci Resolve must not be running during installation.)
Add LensNode to a node
- Open your project, go to the
Colorpage, and select a clip in the timeline. - Click
Effectsin the upper-right corner, then select theLibrarytab. - Find LensNode under Video Village. You can also type
LensNodein the library’s search field. - Drag LensNode onto an empty node in the node graph. Select that node and open the
Settingstab in the Effects pane to access the plugin controls.
Keep LensNode after any technical input conversions and after any creative corrections, but before your conversion to your final output color space or film emulation.
Set your input color space
Set Input Color Space to match the image being supplied to LensNode. Best results will come from camera log inputs or linear spaces; in Resolve Color Management or ACES this is usually your timeline working space, and in a manual node tree it’s usually the camera log space.
Pick a lens and shape the look
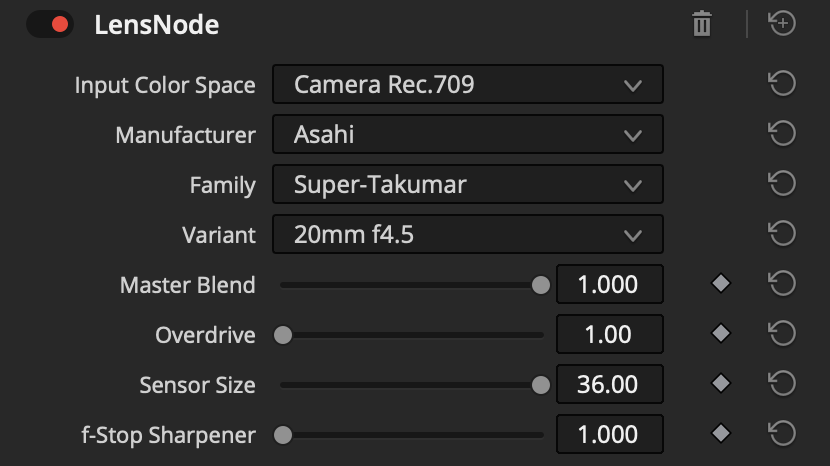
Pick a lens with the Manufacturer, Family, and Variant dropdowns. From there, use Master Blend to dial the overall strength up or down, reach for Overdrive if you want to exaggerate the captured profile, and open Individual Controls to tune each characteristic on its own. The full guide explains every parameter in detail.
 Made in California