


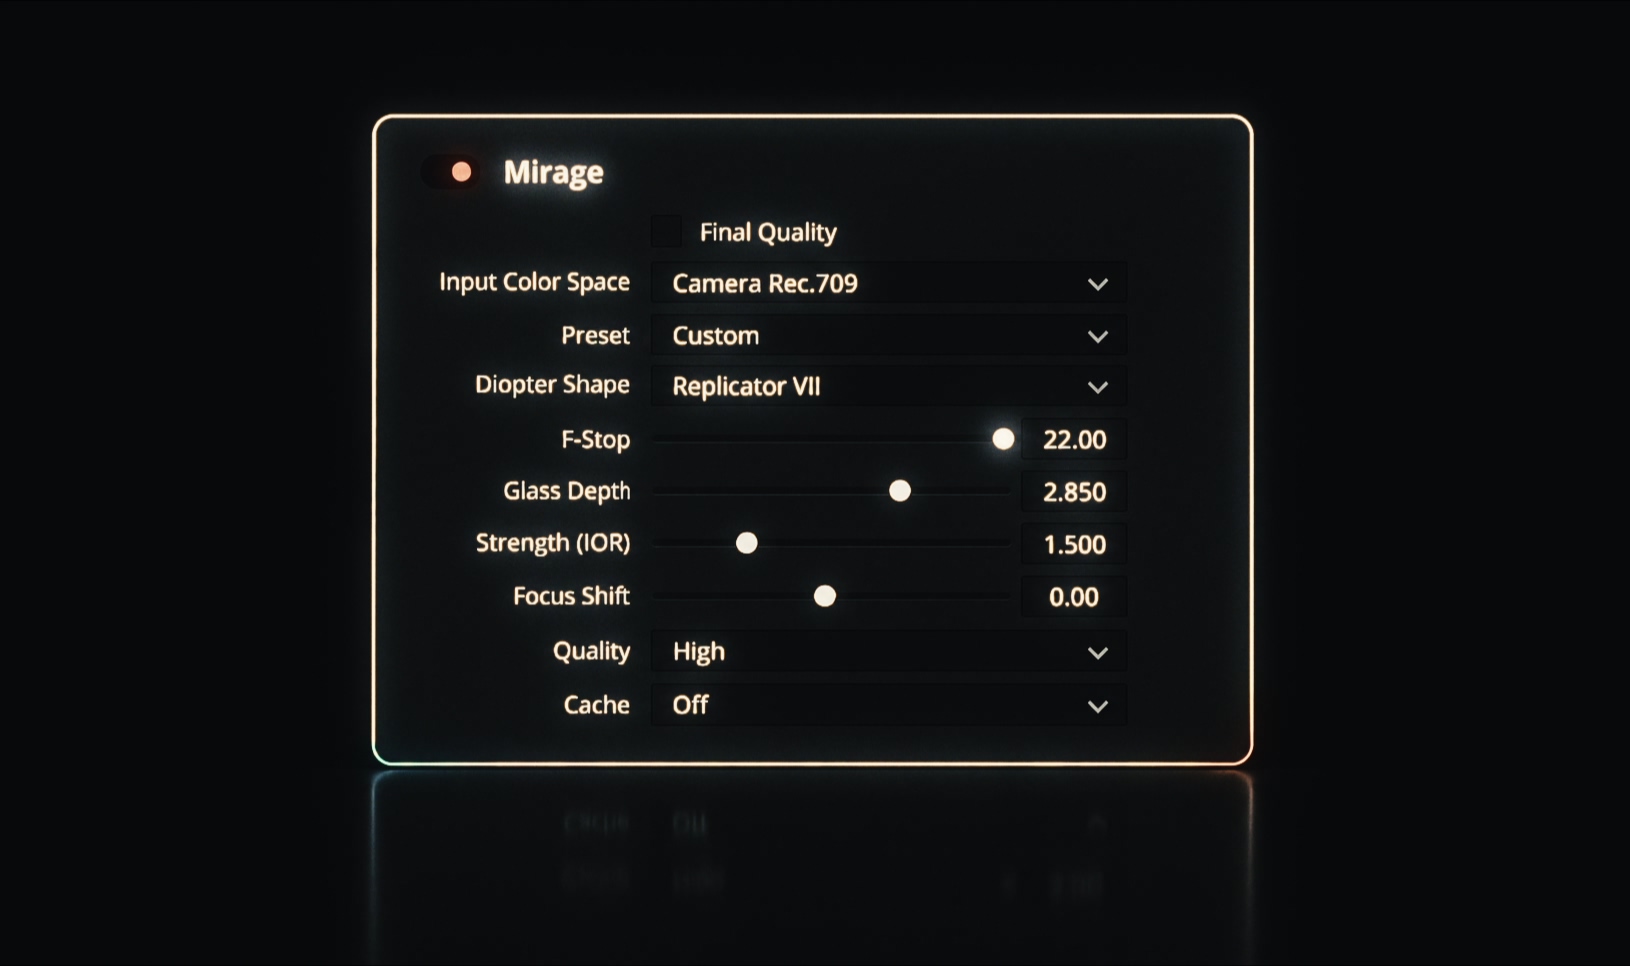
The main parameters appear above the control groups. They set the input, glass shape, camera optics, and render quality.
Final Quality
Enable Final Quality to force all Mirage instances in the current host process to use Final quality. The switch does not change their saved Quality settings. Turn it off to return to those settings.
Final quality bypasses Mirage’s optical cache. While dragging the gizmo or during a host draft render, Interactive Quality still applies. Check the finished sequence at this quality before delivery; do not assume the host will select it automatically.
Input Color Space
Select the color space of the image entering Mirage. If an earlier node or effect has converted the footage, select that working space rather than the original camera space.
Camera log or linear inputs give the best results because they preserve highlight and out-of-range information. Place Mirage before the output transform or film emulation.
Supported input spaces
- ACES2065-1, ACEScc, ACEScct, ACEScg
- Apple Log, Apple Log 2
- Arri LogC3, Arri LogC4
- BMDFilm Gen 5
- DaVinci Wide Gamut Intermediate
- Canon Log 2, Canon Log 3
- Fujifilm F-Log, Fujifilm F-Log2, Fujifilm F-Log2C
- DJI D-Log
- Panasonic V-Log
- RED Log3G10
- Sony S-Log3 S-Gamut3, Sony S-Log3 S-Gamut3.Cine
- Rec709 Gamma 2.4, sRGB Encoded Rec709, Camera Rec709
Footage in an unsupported space
Convert the footage to a supported space before Mirage. In Resolve, use a Color Space Transform node to convert it to DaVinci Wide Gamut/Intermediate, then select the matching input space in Mirage.
Internal working space
Mirage converts the input to ACEScg (AP1 Linear) for optical processing, then returns the result to the selected input space. If the result looks wrong, check Input Color Space first.
Preset
Choose a bundled or saved preset to load its creative settings. The controls remain editable after loading. Input Color Space, Quality, Cache, and import file paths are not saved as creative preset values.
To save a look or choose a startup preset, use Presets & Defaults.
Diopter Shape
Choose the glass geometry. Its shape determines how it redirects the image.
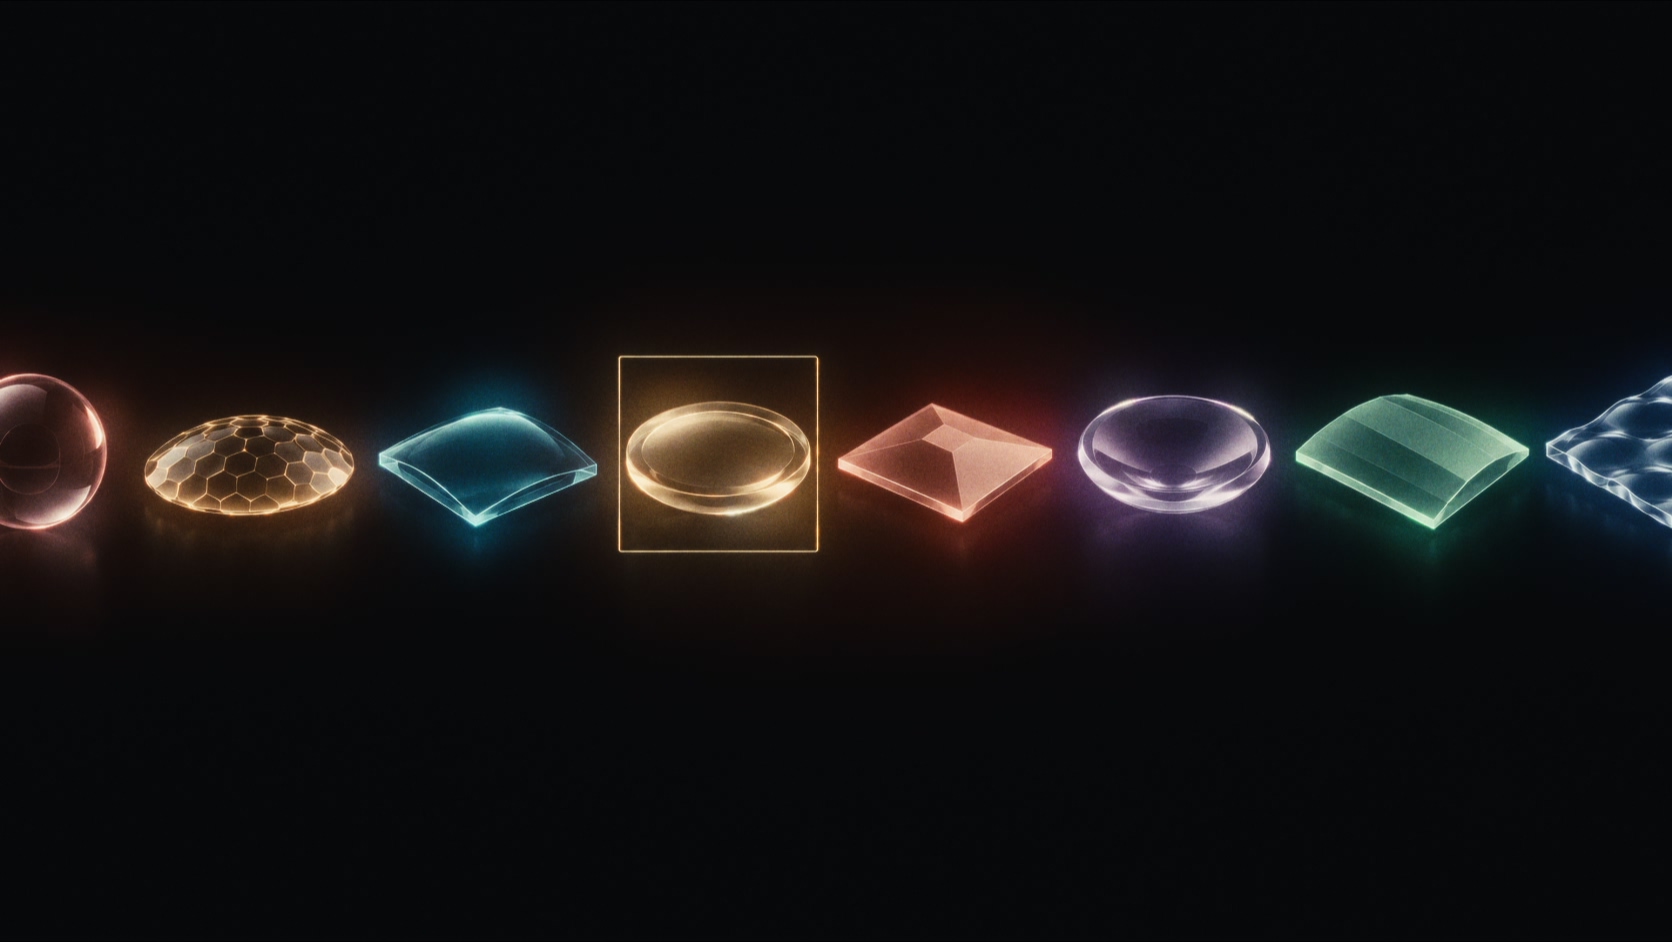
Built-in shapes
- Repeaters create multiple copies of the image.
- Halos concentrate the effect around the frame.
- Wedges displace parts of the image.
- Sphere refracts the image through a glass sphere.
Basic Shape
This menu appears when Diopter Shape is set to Basic shapes.
Choose Tetrahedron, Cube, Octahedron, Dodecahedron, Icosahedron, or Icosphere-0 through Icosphere-3.
User Imports
This menu appears when Diopter Shape is set to User Imports. Select a mesh from your geometry library.
Use Imports › Geometry to add an OBJ mesh, then select it here. See Imports › Geometry.
Choosing between them
For a foreground element, try a wedge or basic solid near an edge of the frame. For repeated images, start with a repeater. Use Movement to move and rotate the glass.
F-Stop
Sets the virtual camera aperture. Lower the value to increase defocus. 22 uses pinhole mode.
Check the glass edges and highlights as you adjust it. Use Focus Shift to change the focus distance without moving the glass.
Glass Depth
Moves the glass closer to or farther from the virtual camera. It changes the glass position, not its thickness. Its appearance also depends on F-Stop and Focus Shift.
Glass Depth is linked to Movement › Position Z. Changing either control updates the other.
Strength (IOR)
Sets the glass index of refraction. Higher values bend light more strongly. 1 produces no refractive bending; 1.5 is typical for glass.
Move the value toward 1 for a more subtle result. Increase it for stronger displacement and distortion.
Focus Shift
Changes the camera focus distance. Positive values move focus closer to the camera; negative values move it farther away. The effect is easier to see at a lower F-Stop.
Working with all four
Choose and position the glass first. Lower F-Stop if you want defocus, set Glass Depth to place the glass, adjust Strength (IOR) for refraction, then use Focus Shift to set focus.
Quality
Choose Interactive, Low, Medium, High, or Final for this instance. Higher settings generally take longer to render. Differences are most visible in defocus, color separation, and fine detail.
Interactive Quality
Use Interactive while adjusting shape, position, and timing. It bypasses the optical cache.
Select Final to check or render this instance at final quality. Use Technical Settings › Final Quality to adjust its sampling controls. Use the Final Quality switch at the top of the panel to apply it to all instances in the current host process. The separate Interactive Quality setting controls gizmo interaction and host draft renders.
Cache
Select On - Disable Animation to reuse optical calculations at Low, Medium, or High quality. This mode ignores X and Y rotation. Mirage turns the cache off when it detects animation that requires new optical calculations, including changes to position, refraction, or focus.
Source images and reflection settings can still change while the cache is in use. Interactive and Final quality bypass the cache without changing its saved selection. Returning to Low, Medium, or High restores that selection.
Set Cache to Off when working with animation in Movement.
Practical workflow
- Use Interactive quality to choose a shape and set its position.
- Keep Cache off while adjusting animation.
- Check representative frames at Final quality and full output resolution.
- Enable Final Quality before the final render if you want all instances to use it. Refresh any host render caches that still show an earlier result.
- Use the host’s render cache or pre-render the clip if playback is too slow.
Control groups
Explore the groups below for movement, creative controls, rendering settings, presets, and imports.
 Made in California