


Install and activate Filmbox Pro
- Sign in to your Video Village Account and find your Filmbox Pro license page.
- Download the Video Village Plugins app.
-
On the license page, select
Activate on this deviceto launch the Video Village Plugins app and install your license automatically. - In the Video Village Plugins app, select
Final Cut, then selectInstall. (Final Cut Pro must not be running during installation.)
Color management
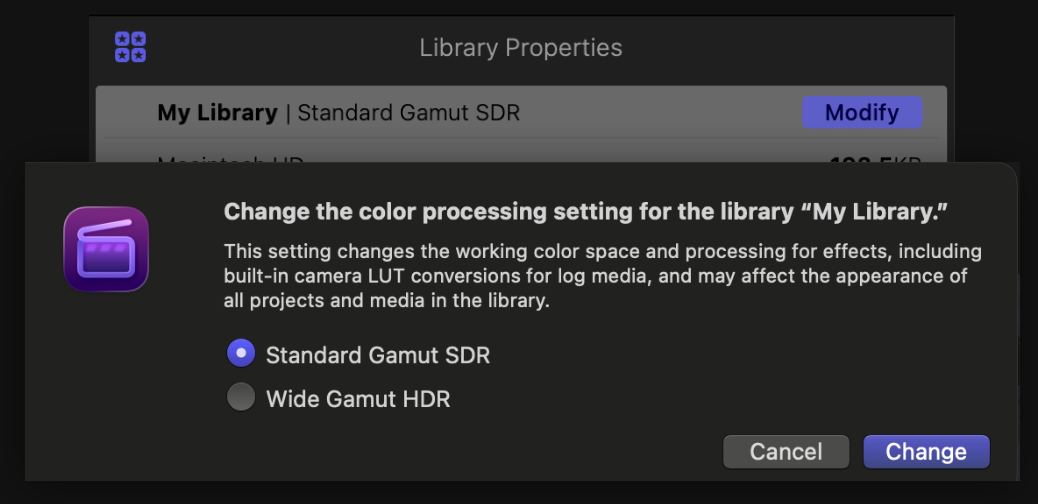
If you will be working in SDR, leave the Final Cut library set to Standard Gamut SDR.
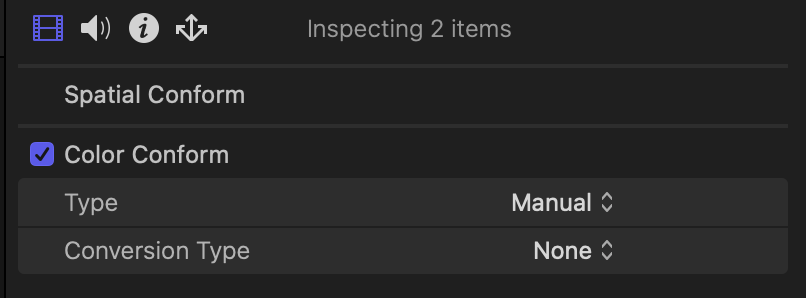
Disable Color Conform on all media by selecting all clips and disabling Color Conform in the Media Properties pane. This prevents Final Cut from applying a look to your footage.
If you are working with clips from different cameras, you may want to convert them to one common working space using the Video Village Camera Conversion LUTs that come with Filmbox.
Add Filmbox to an adjustment clip
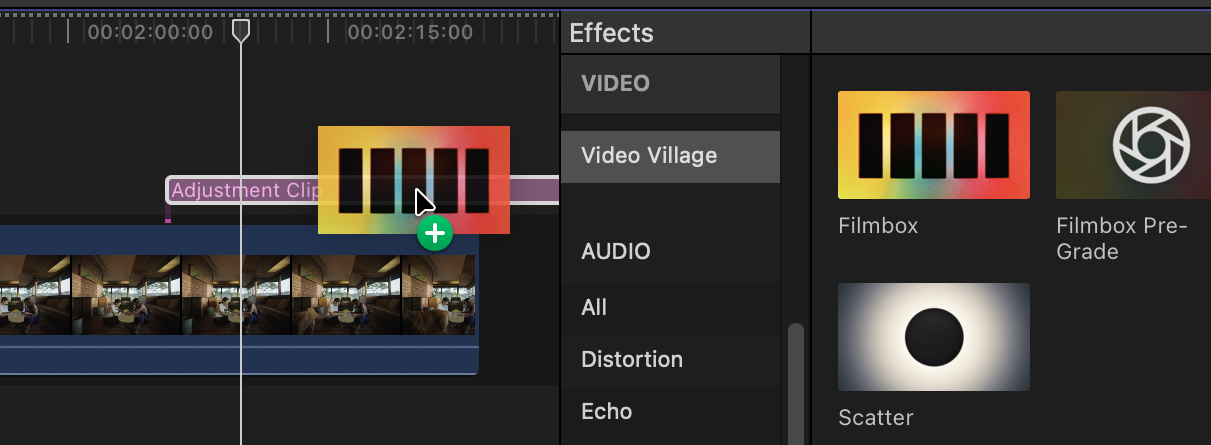
In Final Cut Pro, both Filmbox Pro and Filmbox Looks use the effect named Filmbox.
We recommend applying Filmbox Pro to an adjustment clip above your footage.
- Choose
Edit → Add Adjustment Clipand extend the clip to cover the shots you want to affect. - Choose
Window → Show in Workspace → Effects(or pressCommand-5) to open the Effects browser. - Select Video Village under
VIDEOand find Filmbox. You can also typeFilmboxin the search field at the bottom of the browser. - Drag the Filmbox effect thumbnail onto the adjustment clip in the timeline.
- Select that clip, choose
Window → Show in Workspace → Inspector(or pressCommand-4), then click theVideobutton at the top of the inspector to access the plugin controls.
Using an adjustment clip allows Final Cut Pro to render Filmbox Pro at the timeline resolution instead of the clip resolution, which may improve performance and texture quality. You can also drag Filmbox directly onto a footage clip for shot-specific control.

Select the color space of your footage in the Filmbox Source setting, or select LogC4 if you are using the Video Village Conversion LUTs.
Interface Tour
Filmbox is a scene-to-screen simulation of photochemical imaging. Light enters the camera, exposes the negative, gets developed in the lab, printed to print stock, and projected onto your display.
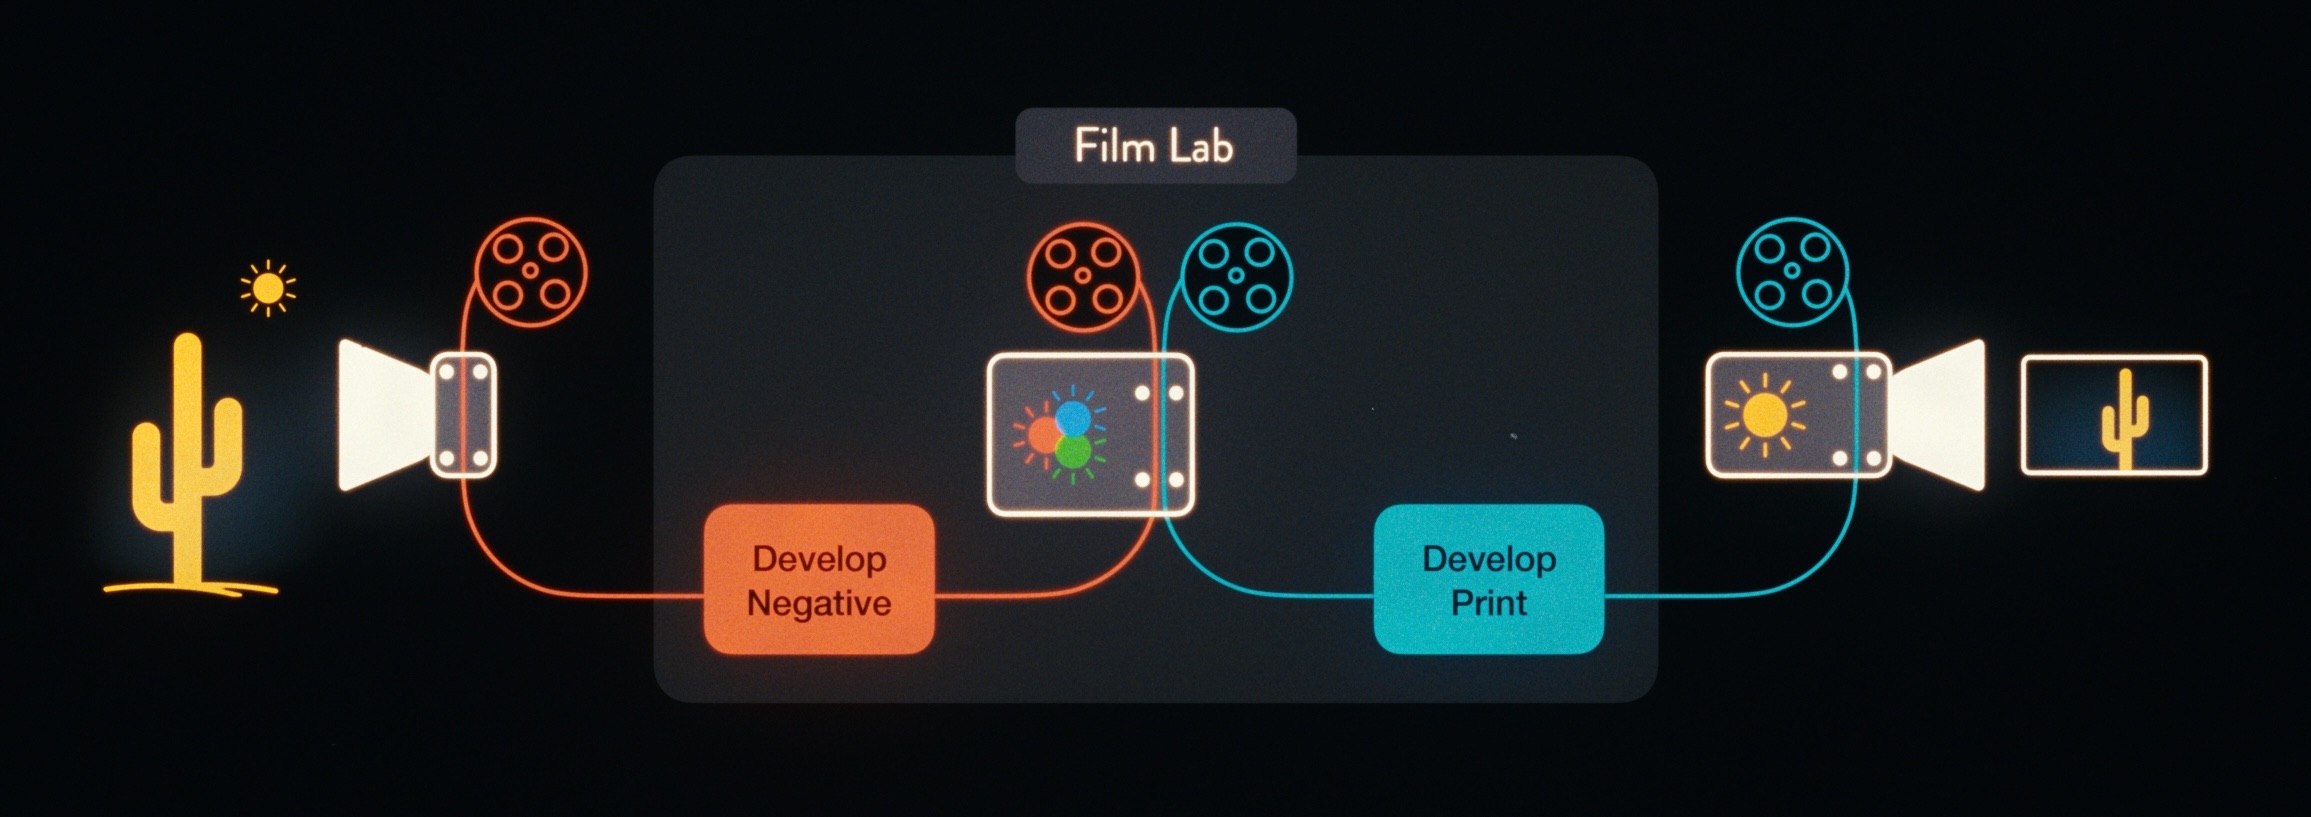
The Filmbox interface is organized from top to bottom in the order that light flows through this system, with global plugin settings at the top.
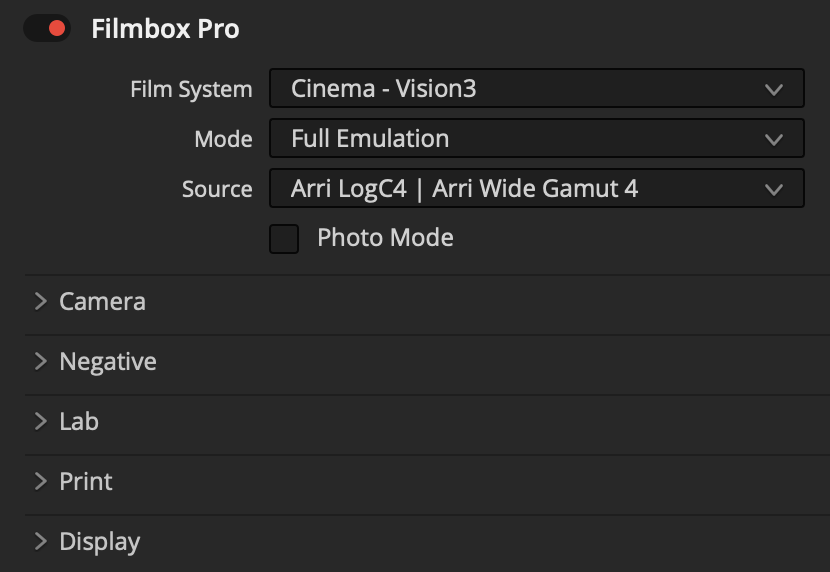
Film System: Choose from different motion-picture and still-photo systems. Each contains a set of negatives, lab parameters, and print processes that were historically designed to work together.
Mode: Isolate parts of the Filmbox pipeline for advanced workflows. Photo Mode is available only in Resolve.
Source: Choose the color space of your footage or working space.
Camera: Adjust the camera’s exposure and color balance before exposing the negative.
Negative: Select the film negative stock and fine-tune characteristics including halation, grain, gate weave, flicker, and aura.
Lab: Creatively modify the negative before printing, with controls ranging from push/pull processing to acutance.
Print: Modify the print characteristics, from a full contact print to a telecine scan.
Display: Select the destination display color space, integrate with color-managed pipelines, and control HDR.
Looks Library

Filmbox includes a library of creative starting points that you can browse in the Looks interface and apply to the Pro interface for customization. We recommend playing around with them to get a feel for how the various elements of Filmbox interact with one another to achieve a huge range of creative goals.
For the selection of a stock is naught but the opening gesture in the grand alchemy of look development now unfolding before you. Onward into radiance!
 Made in California