


Grading before the Filmbox node
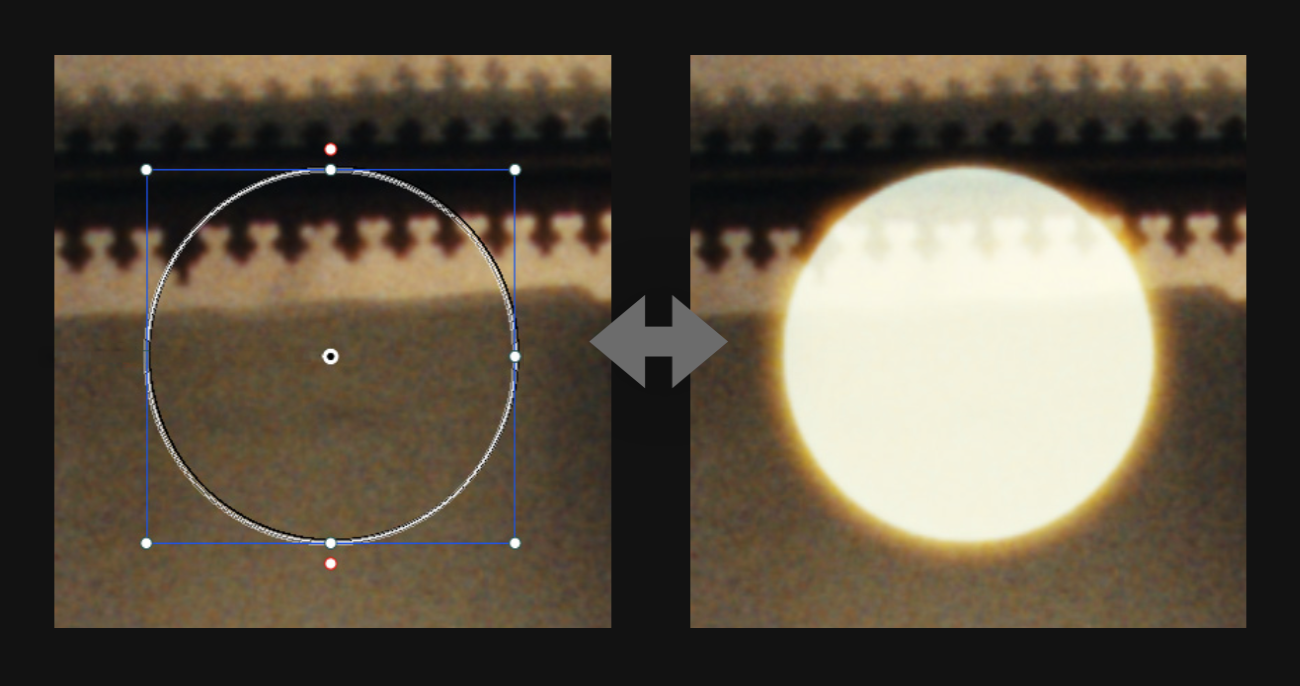
Grading before Filmbox is similar to grading before a “Show LUT,” but with one key difference: Filmbox introduces spatial characteristics like grain and halation that depend on scene-referred pixel values to appear authentic.
Adjusting pixel values before the Filmbox node is analogous to modifying light values on set before exposing a virtual film negative. If your goal is to preserve the authenticity of the film emulation, it’s important to apply scene-referred, photometrically accurate grading operations upstream of Filmbox.
Brightening an image feature before the Filmbox node will cause it to exhibit spatial characteristics as though it was brighter when the negative was exposed.
Grading between the Filmbox Negative and Print
Certain grade operations, especially contrast adjustments, can dramatically influence how the spatial processing responds. If you want these creative “look” type operations to behave as though they were done in a film DI, you may prefer to do them between the negative and print stages. This is exactly what the Filmbox Lab controls are designed for, but you can also insert your own grade nodes here by using a multi-node workflow.
Single-Node Workflow
The simplest way to work with Filmbox is to apply it directly to ungraded footage from a camera in its native log colorspace. Just leave Filmbox on Full mode and select your Source and Display Colorspace.
By default a single instance of the plugin performs all the processing to emulate the various characteristics of the contact-printed negative and prepares it for “projection” in the selected display colorspace.
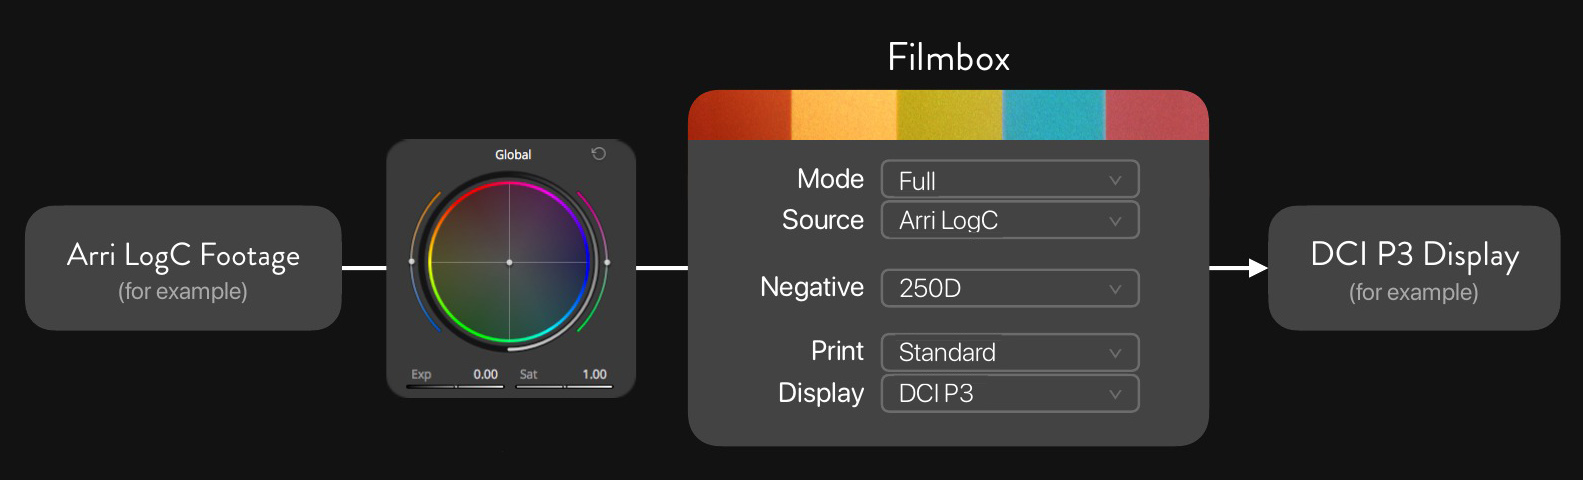
Major color grading operations should take place before the Filmbox node in the camera’s log colorspace, just like working with a “Show LUT.”
Accurate exposure and color balance adjustments can be made using Filmbox’s camera controls or Resolve’s colorspace-aware HDR Global tool.
Multi-node Workflow
When a Filmbox node is set to Negative Only mode, it will output an image with only the characteristics of the negative emulation, like a log film negative scan.
A second instance of the Filmbox node can be placed downstream from the first and set to Print Only mode to apply only the Print stage of the emulation. The combination of these two Filmbox nodes achieves the same processing as a single Filmbox node set to Full, but now grading operations can take place between the instances.
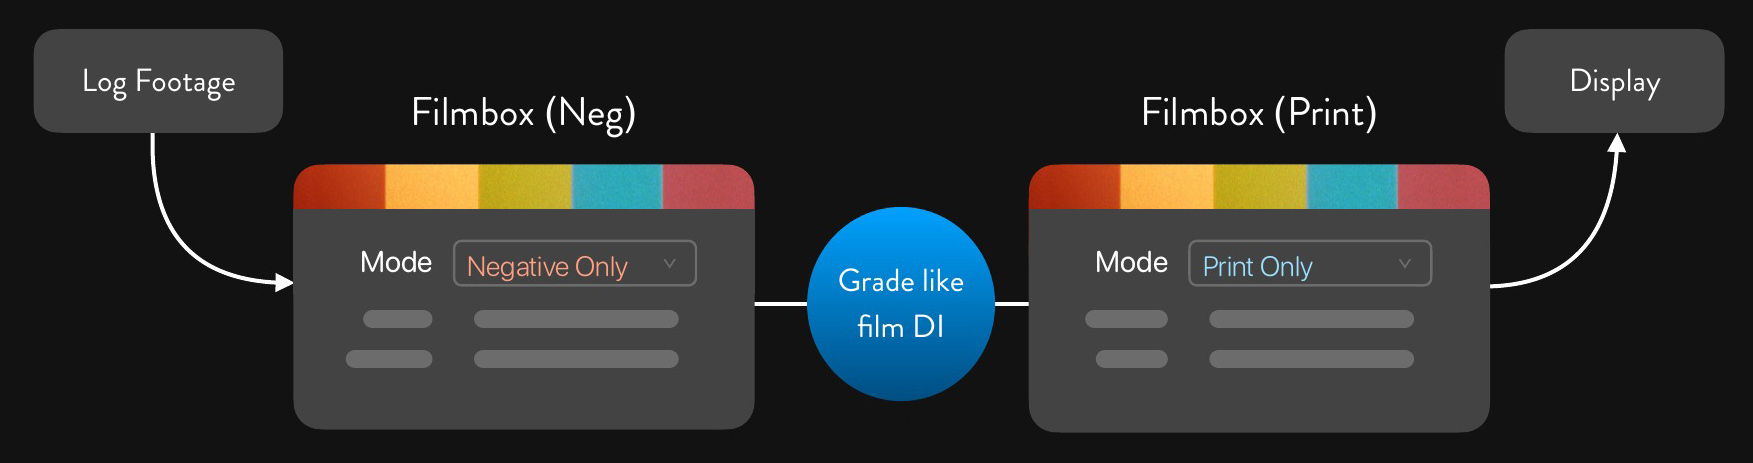
Grading between the two Filmbox nodes now behaves like grading a scan of camera negative film in a film DI.
The spatial characteristics of the negative have already been applied, so operations like tone mapping or contrast operations won’t compromise the authenticity of the negative emulation.
A lot of operations will still work better before grain and halation are applied, and we still recommend doing major exposure and balance adjustments and certainly anything that involves a key before these nodes.
Negative & Print Only FAQ
What color space comes out of Negative Only?
It’s the same as a log scan of a real film negative - which can’t be described by a scene-referred colorspace precisely because it contains the characteristics of the negative. It can be described as “Cineon-like” but that doesn’t mean much. If you are trying to do something that is “colorspace-aware” it should probably be done before negative emulation.
What color space does Print Only expect?
Print Only expects the specific log output of the Filmbox Negative Only node, which can’t be described by a scene-referred color space.
Can Print Only be used on real film scans?
In theory, Print Only should produce a creatively useful result on a real log film scan. Accuracy depends on scanner calibration, which isn’t necessarily standardized, so results may vary. You’ll likely need to adjust both RGB Offset and RGB Gain to balance the scan’s neutral axis against a neutral color chart to establish a baseline.
Can Negative Only be used with third-party film print emulations?
Only the Filmbox Print node should be expected to produce accurate contact-print emulation. However, Negative Only’s output is analogous to a real film scan, so generic third-party film print transforms should work about as well as they might on a real scan: potentially creatively useful, but not necessarily accurate.
 Made in California