


Install and activate Filmbox Pro
- Sign in to your Video Village Account and find your Filmbox Pro license page.
- Download the Video Village Plugins app.
-
On the license page, select
Activate on this deviceto launch the Video Village Plugins app and install your license automatically. - In the Video Village Plugins app, select
OpenFX, then selectInstall. (DaVinci Resolve must not be running during installation.)
Color management
In Resolve 20 or later, the default color settings are appropriate for typical SDR workflows on most systems.
For HDR or advanced color management workflows, see the Color Management guide.
Add Filmbox to a node
- Open your project, go to the
Colorpage, and select a clip in the timeline. - Click
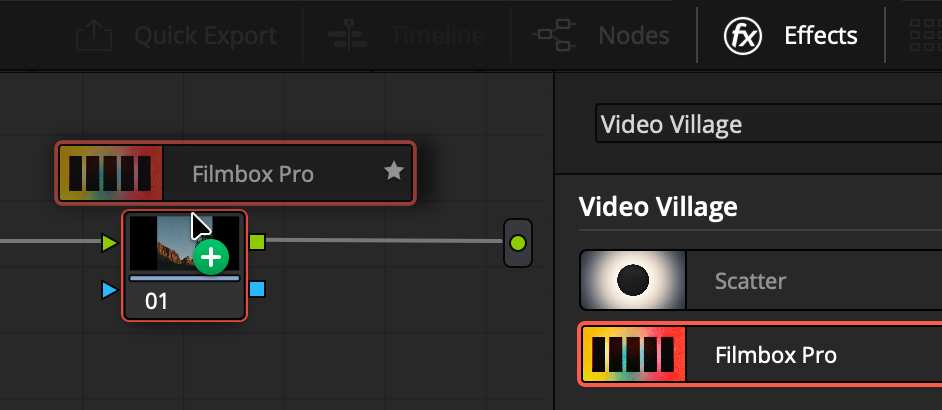
Effectsin the upper-right corner, then select theLibrarytab. - Find Filmbox Pro under Video Village. You can also type
Filmbox Proin the library’s search field. - Drag Filmbox Pro onto an empty node in the node graph. Select that node and open the
Settingstab in the Effects pane to access the plugin controls.
Select your camera

Set Source in Filmbox to match the color space your footage was recorded in or the working space you have transformed it into.
-
If you are unsure what color space your footage is in, you can sometimes find it listed in the
Metadatapane on theMediapage. -
For RAW footage, you may need to configure Resolve’s
Camera RAWsettings to output clips in the camera’s log space rather than Rec.709. -
For graphics or clips that were not recorded in a log color space, you can set
Sourcein Filmbox to(Inaccurate) Rec.709 Gamma 2.4. This will be less accurate than working with scene-referred footage, but it may still produce a useful result.
Interface Tour
Filmbox is a scene-to-screen simulation of photochemical imaging. Light enters the camera, exposes the negative, gets developed in the lab, printed to print stock, and projected onto your display.
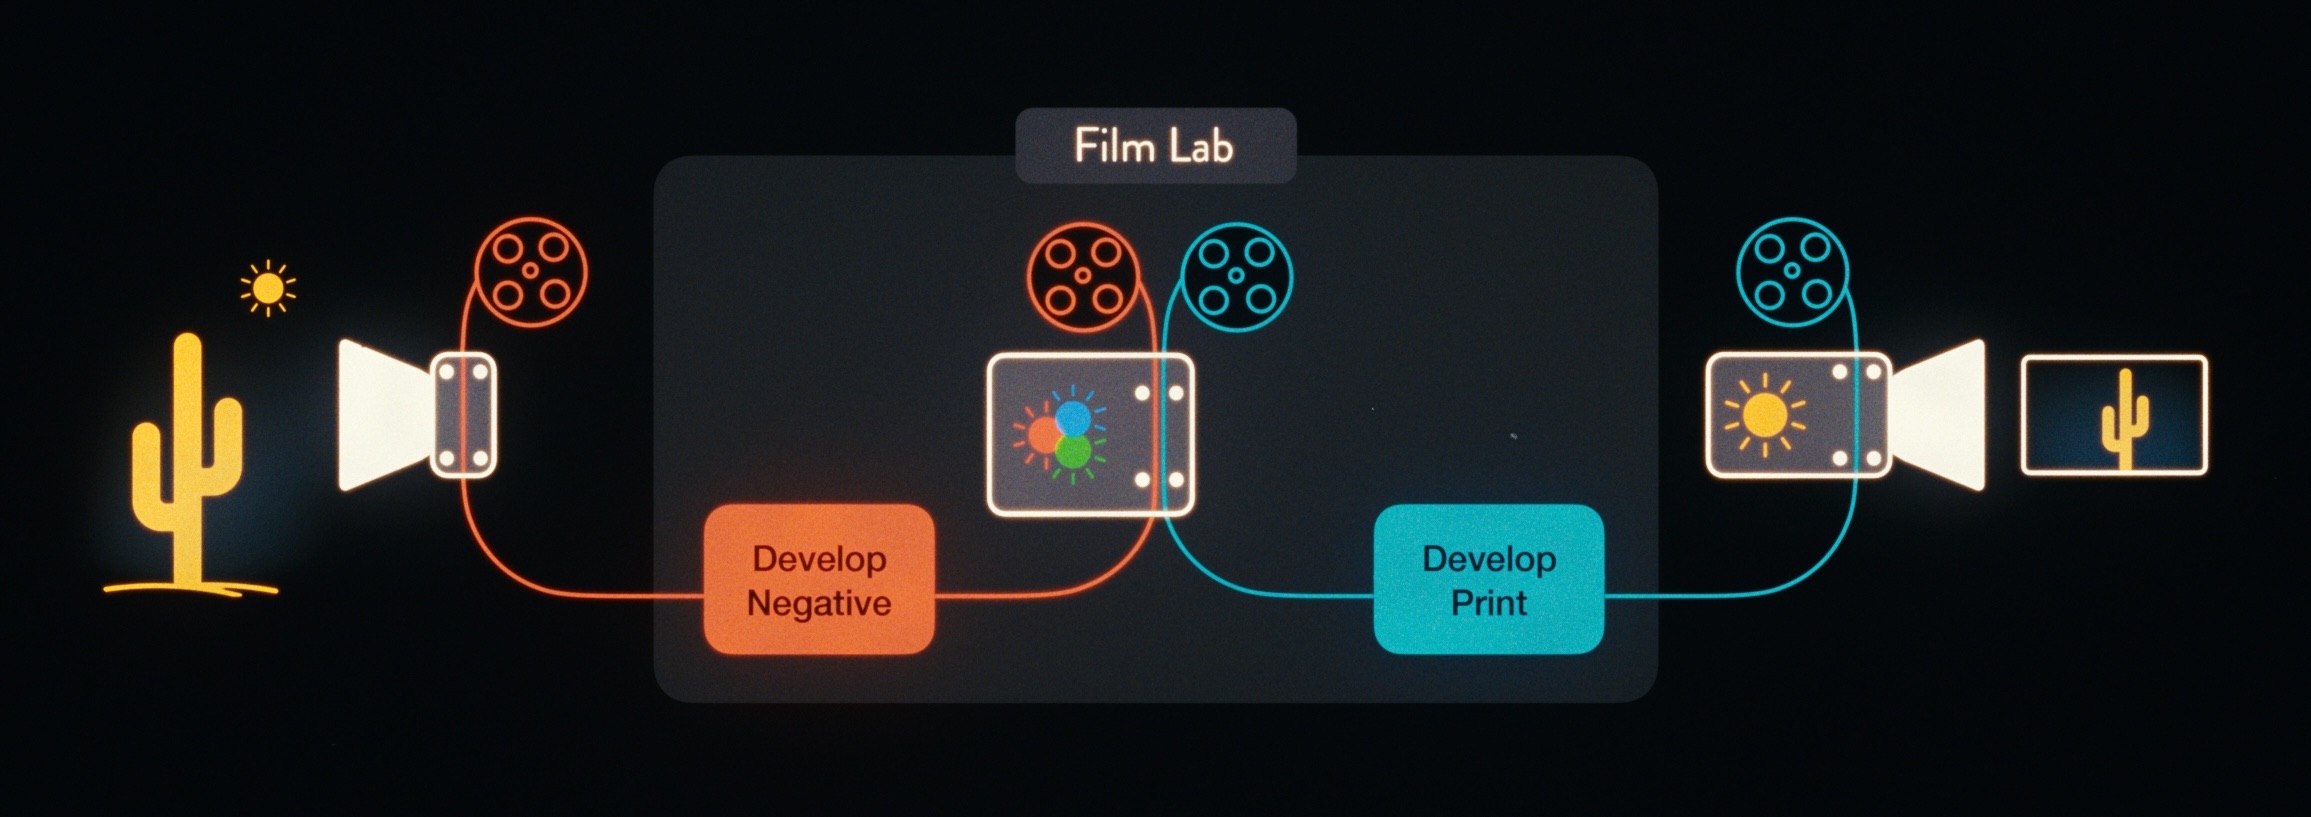
The Filmbox interface is organized from top to bottom in the order that light flows through this system, with global plugin settings at the top.
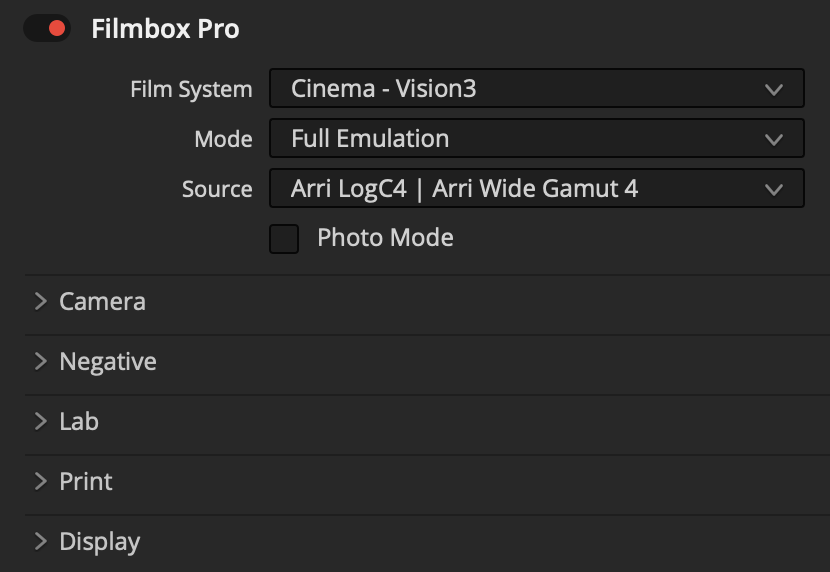
Film System: Choose from different motion-picture and still-photo systems. Each contains a set of negatives, lab parameters, and print processes that were historically designed to work together.
Mode: Isolate parts of the Filmbox pipeline for advanced workflows, or use Resolve’s still-photo functionality with Photo Mode.
Source: Choose the color space of your footage or working space.
Camera: Adjust the camera’s exposure and color balance before exposing the negative.
Negative: Select the film negative stock and fine-tune characteristics including halation, grain, gate weave, flicker, and aura.
Lab: Creatively modify the negative before printing, with controls ranging from push/pull processing to acutance.
Print: Modify the print characteristics, from a full contact print to a telecine scan.
Display: Select the destination display color space, integrate with color-managed pipelines, and control HDR.
Looks Library

Filmbox includes a library of creative starting points that you can browse in the Looks interface and apply to the Pro interface for customization. We recommend playing around with them to get a feel for how the various elements of Filmbox interact with one another to achieve a huge range of creative goals.
For the selection of a stock is naught but the opening gesture in the grand alchemy of look development now unfolding before you. Onward into radiance!
 Made in California